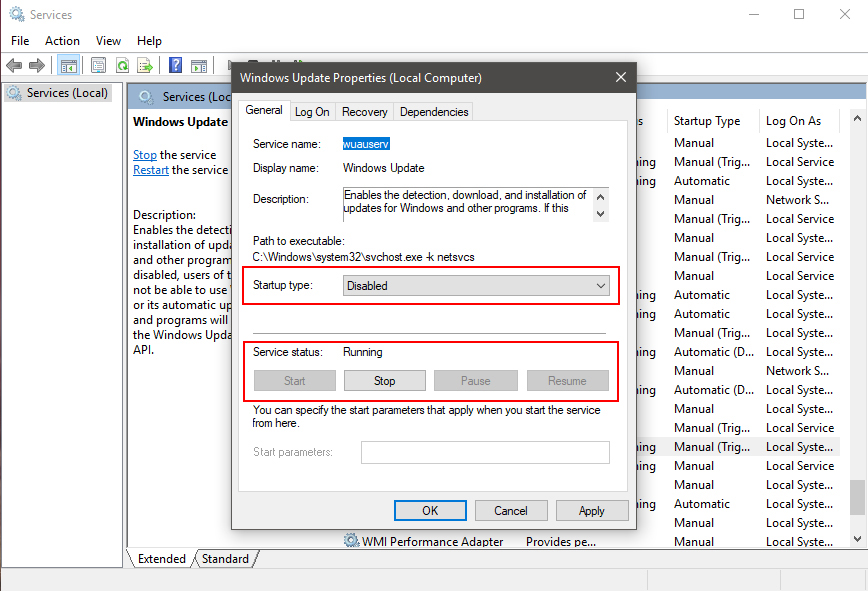
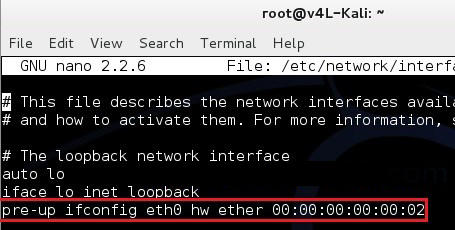
Step 1. After installing Microsoft Office 2019.
Step 2. Copy the Code below:
@echo off
title Activate Microsoft Office 2019 ALL versions for FREE!&cls&echo ============================================================================&echo #Project: Activating Microsoft software products for FREE without software&echo ============================================================================&echo.&echo #Supported products:&echo - Microsoft Office Standard 2019&echo - Microsoft Office Professional Plus 2019&echo.&echo.&(if exist "%ProgramFiles%\Microsoft Office\Office16\ospp.vbs" cd /d "%ProgramFiles%\Microsoft Office\Office16")&(if exist "%ProgramFiles(x86)%\Microsoft Office\Office16\ospp.vbs" cd /d "%ProgramFiles(x86)%\Microsoft Office\Office16")&(for /f %%x in ('dir /b ..\root\Licenses16\ProPlus2019VL.xrm-ms') do cscript ospp.vbs /inslic:"..\root\Licenses16\%%x" >nul)&(for /f %%x in ('dir /b ..\root\Licenses16\ProPlus2019VL.xrm-ms') do cscript ospp.vbs /inslic:"..\root\Licenses16\%%x" >nul)&echo.&echo ============================================================================&echo Activating your Office…&cscript //nologo slmgr.vbs /ckms >nul&cscript //nologo ospp.vbs /setprt:1688 >nul&cscript //nologo ospp.vbs /unpkey:6MWKP >nul&cscript //nologo ospp.vbs /inpkey:NMMKJ-6RK4F-KMJVX-8D9MJ-6MWKP >nul&set i=1
:server
if %i%==1 set KMS=kms7.MSGuides.com
if %i%==2 set KMS=kms8.MSGuides.com
if %i%==3 set KMS=kms9.MSGuides.com
if %i%==4 goto notsupported
cscript //nologo ospp.vbs /sethst:%KMS% >nul&echo ============================================================================&echo.&echo.
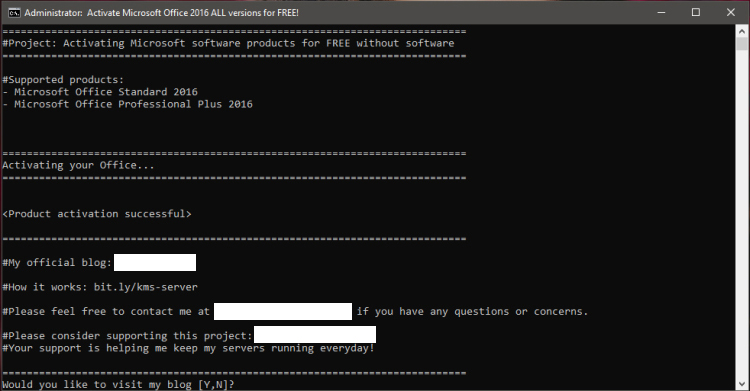
cscript //nologo ospp.vbs /act | find /i "successful" && (echo.&echo ============================================================================&echo.&echo #My official blog: hackerkitty.wordpress.com&echo.&echo #Please feel free to contact me at alexandria4445@gmail.com if you have any questions or concerns.&echo.&echo #Please consider supporting this project: hackerkitty.wordpress.com&echo #Your support is helping me keep my servers running everyday!&echo.&echo ============================================================================&choice /n /c YN /m "Would you like to visit my blog [Y,N]?" & if errorlevel 2 exit) || (echo The connection to my KMS server failed! Trying to connect to another one… & echo Please wait… & echo. & echo. & set /a i+=1 & goto server)
explorer "https://hackerkitty.wordpress.com"&goto halt
:notsupported
echo.&echo ============================================================================&echo Sorry! Your version is not supported.&echo Please try installing the latest version here: bit.ly/aiomsp
:halt
pause >nul
Step 3. Open Notepad. Paste the Code and save as Office2019.cmd. Close Notepad.
Step 4. Right click Office2019.cmd file and select run as administrator.
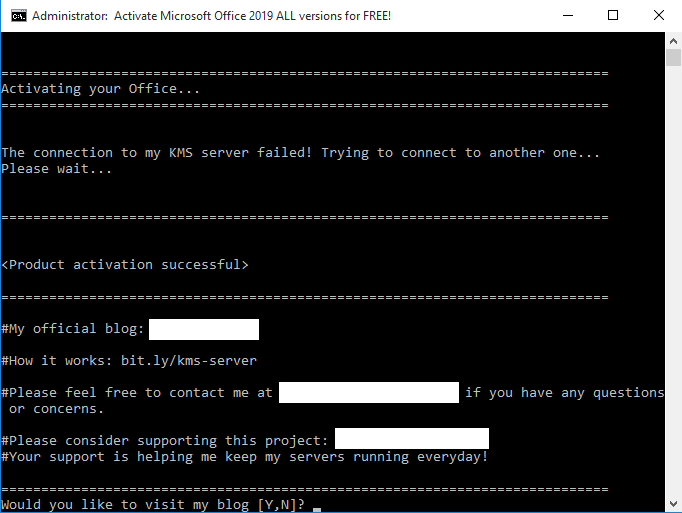
Step 5. Close Command Prompt. Check Microsoft Word or any Office file to see Microsoft Office 2019 activated.
All Done!